
I adopted my cat Pepper when she was two years old and nobody had ever trimmed her nails properly. The rescue centre warned me she was quote unquote feisty about grooming which turned out to be a polite way of saying she treated any attempt to touch her paws like a personal attack. The first time I tried to trim her nails she left three scratches on my forearm and disappeared under the bed for an hour.
That was four years ago. These days I trim her nails every three weeks without drama. She sits in my lap, I work through each paw, she gets a treat at the end and we are both fine. The difference between then and now was not Pepper changing her personality. It was me learning the right approach, the right tools, and the right timing.
If you are trying to figure out how to trim cat nails, whether your cat is cooperative or absolutely not, this guide covers everything from the basics to the trickiest situations including cats that fight back, nails that are too long, and what to do when things go wrong.
Why Trimming Your Cat’s Nails Actually Matters
Before getting into the how, it is worth being clear about the why because a lot of cat owners skip nail trimming entirely and assume it is optional. It is not really.
Cats that live indoors do not wear their nails down naturally the way outdoor cats do on rough surfaces. Without regular trimming indoor cat nails grow continuously and eventually curve, at which point they can grow into the paw pad itself. That is painful and leads to infection. Even before they reach that point overgrown nails catch on fabrics and carpets, cause your cat discomfort when walking on hard floors, and make every accidental scratch from your cat far worse than it needs to be.
Long nails also mean more damage to your furniture, your skin, and anything else your cat decides to use as a scratching surface. Keeping them trimmed does not stop scratching behaviour but it significantly reduces the damage.
Most indoor cats need their nails trimmed every two to four weeks. If you can hear clicking on hard floors or your cat is getting their nails caught on things regularly they are already overdue.
What You Need Before You Start
Getting the right tools together before you touch your cat makes the whole process faster and less stressful for both of you.
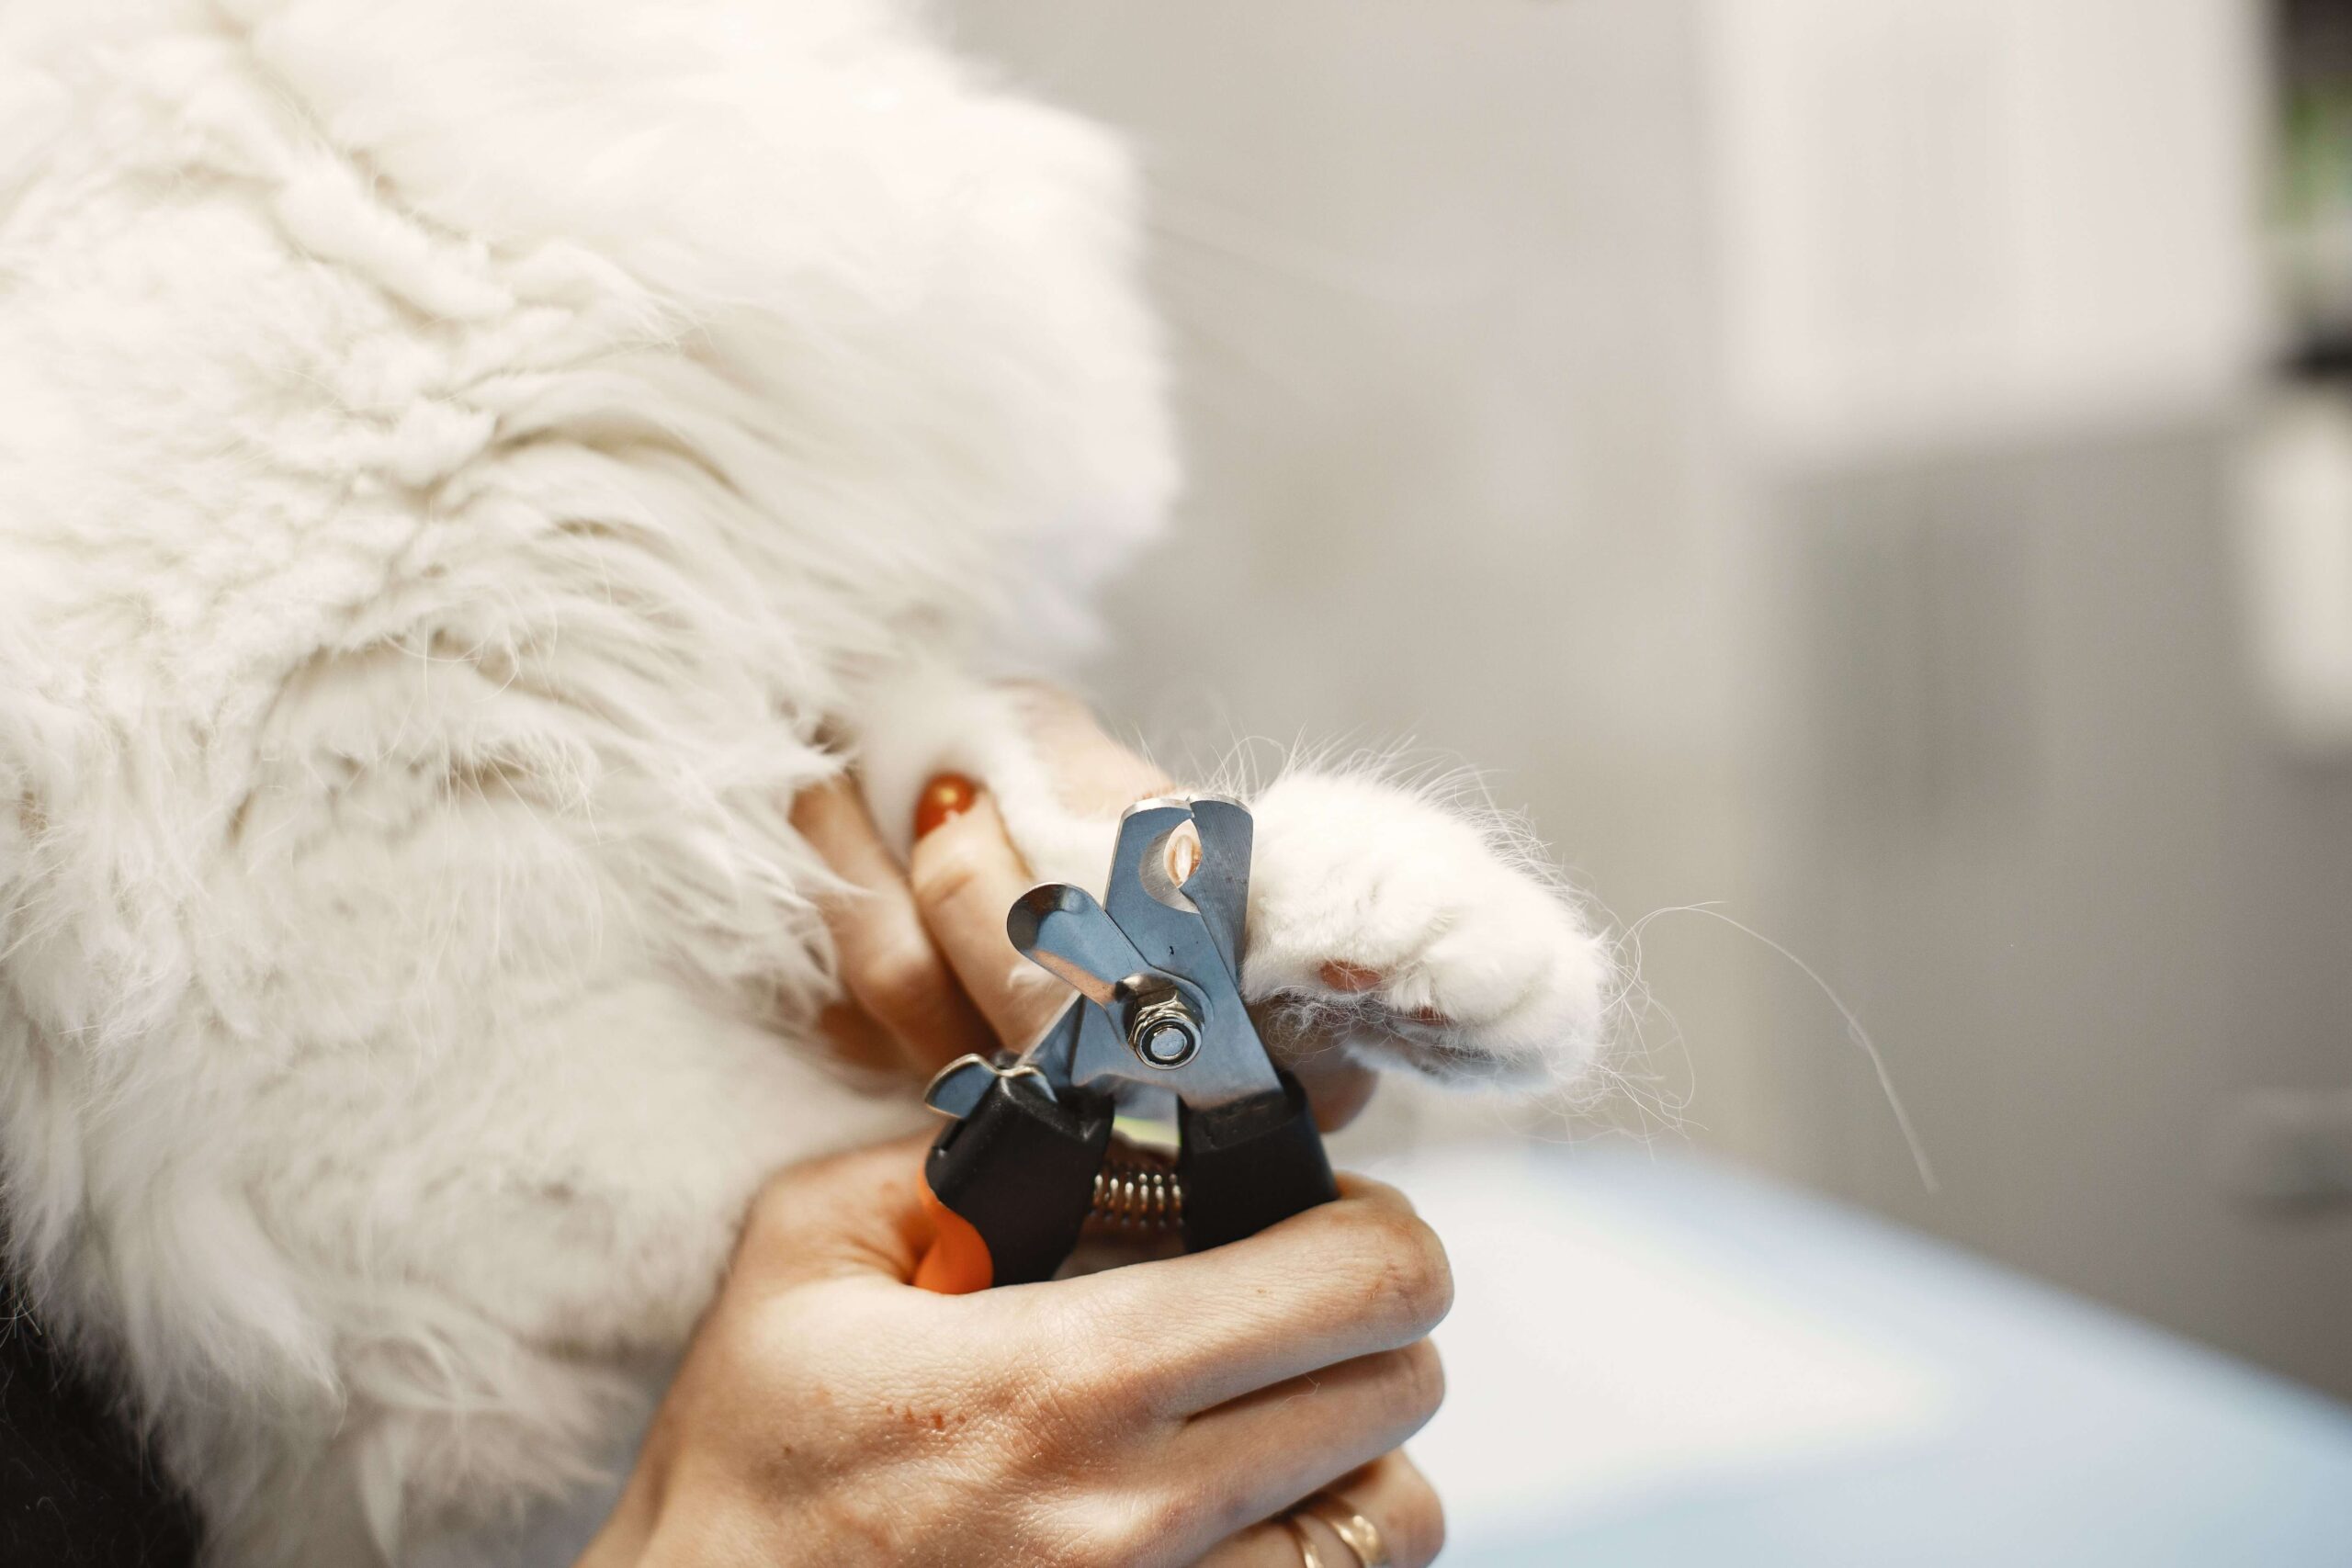
Cat nail clippers. Do not use human nail clippers on a cat. Human clippers are designed for flat nails and tend to crush or split a cat’s rounded nail rather than cutting it cleanly. A proper pair of cat nail clippers costs very little and makes a significant difference. Scissor style clippers are the most popular choice. Guillotine style clippers also work well. Whatever you buy make sure the blade is sharp. Dull clippers cause the same crushing problem as human ones.
Styptic powder. This stops bleeding almost instantly if you cut too far. Buy it before you need it. Having it ready means that an accidental cut into the quick is a minor inconvenience rather than a ten minute panic. Cornstarch works in an emergency but styptic powder is considerably faster and more reliable.
Treats. High value treats your cat genuinely loves. Not their regular dry food. Something special that they do not get at other times. The whole process of building a cooperative cat runs on positive association and treats are your primary tool.
A towel. Useful for wrapping a resistant cat if needed and for catching anything that goes sideways.
Understanding the Quick
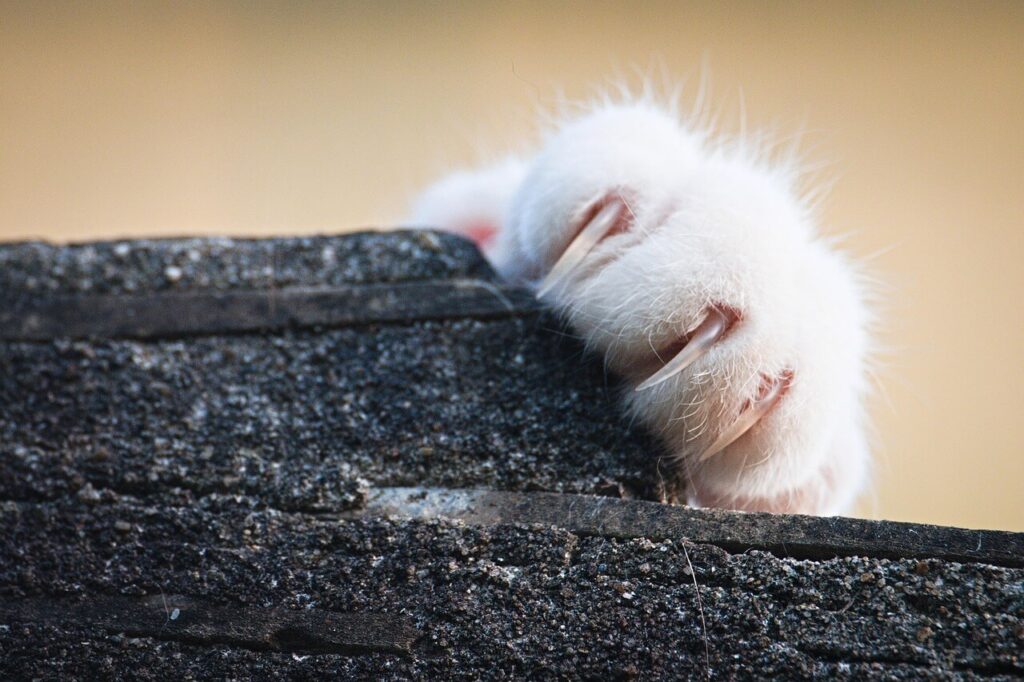
The quick is the pink blood vessel that runs through the center of every cat nail. Cutting into it causes pain and bleeding. Avoiding it is the thing everyone worries about most and it is easier than it sounds once you know what you are looking at.
Cat nails are translucent, meaning you can see through them if you hold them up to light. The quick appears as a pink shadow inside the nail. You cut below that pink area and you are completely safe. Leave a couple of millimetres between your cut and where the pink starts and you will not touch it.
The only exception is cats with dark or black nails where the quick is not visible from the outside. There is a technique for this covered later in this guide.
How to Trim Cat Nails at Home Step by Step
Step 1: Choose the Right Moment
Timing is everything with cat nail trimming. A cat that is alert, playful, or in a mood is going to fight you. A cat that has just eaten, had a play session, or is drowsy and relaxed is going to be infinitely more cooperative.
Never start a nail trimming session when your cat is already agitated. Wait until they come and settle near you of their own accord. That relaxed moment is your window.
Step 2: Start With Paw Handling Long Before You Use Any Clippers
If your cat is not used to having their paws touched this is the step that actually fixes the problem. You cannot skip it and expect clippers to go smoothly.
Every day for a week or two, while your cat is relaxed and you are just sitting with them, pick up a paw gently, hold it for a few seconds, and put it down. Give a treat. Do this repeatedly across multiple sessions. You are teaching your cat that paw handling leads to good things and nothing scary happens.
Once your cat accepts paw handling without pulling away, introduce the clippers. Let them sniff the clippers. Touch the clippers to their paw without doing anything. Squeeze the clippers near their paw so they hear the sound. Give a treat each time. This desensitisation sounds slow but it is genuinely the fastest route to a cooperative cat because you are not fighting a panicked animal every session.
Step 3: Extend the Nail Correctly
Hold your cat comfortably in your lap or on a stable surface. Take one paw and hold it gently but firmly. To extend a single nail press down lightly on the pad with your thumb while lifting the top of the toe slightly with your finger. The nail will extend outward and you will have a clear view of it.
Work with one nail at a time. Do not try to rush through the whole paw at once.
Step 4: Make the Cut
Position the clippers at the tip of the nail, perpendicular to it rather than at an angle. Find the pink quick and cut two to three millimetres below it. Squeeze the clippers in one smooth firm motion. Do not use multiple small squeezes which can cause the nail to crack or split.
Cut just the sharp tip. You do not need to cut all the way back to where the nail starts to curve. Removing the sharp point is what you are after. It is better to take a little less than you planned than to get too close to the quick.
Step 5: Work Through the Paws Gradually
Do not force yourself to complete all four paws in one sitting, especially early in the process. Two paws today and two tomorrow is completely acceptable. Three nails and done if your cat is reaching their limit is fine too. Stopping before your cat reaches peak stress means the next session starts from a better place rather than a cat that remembers last time as a terrible experience.
Give treats between each paw and give genuine praise in a calm quiet voice. Cats respond well to calm energy. If you are tense your cat reads it and becomes tense too.
Do not forget the dewclaws. These are the small nails on the inner side of each front leg positioned roughly where a thumb would be. They never make contact with the ground so they never get naturally filed down and they often become the longest and most overgrown nails on a cat. Many owners forget them entirely until they curl right around.
How to Trim Cat Nails When They Won’t Let You
This is the question that brings most people here and the answer is that the desensitisation process in Step 2 above is the real long term solution. But there are also some practical strategies for cats that are resistant right now.
The burrito wrap. Wrap your cat firmly but gently in a thick towel leaving only the paw you are working on exposed. Many cats that fight when completely free become surprisingly calm when wrapped. It feels restrictive from the outside but it actually makes many cats feel more secure. Work quickly and release them as soon as you are done.
The scruff hold. Gently gripping the scruff of the neck causes cats to go still. This is how mother cats carry kittens and it triggers a calming response in most cats. Use it only for the few seconds you need to make a cut, not as a prolonged restraint method.
The distraction method. A lick mat spread with a thin layer of wet food, cream cheese, or unsalted peanut butter works brilliantly for some cats. While they are focused entirely on licking you work through as many nails as possible. This is the method that finally worked for Pepper. She was so interested in the food she barely registered what I was doing with her paws.
Two person approach. One person holds and reassures the cat while the other does the clipping. This is much easier than trying to do both yourself when your cat is uncooperative.
Multiple very short sessions. If your cat will only tolerate one or two nails before they have had enough, do one or two nails. Every day. You will get through all of them over the course of a week and your cat barely accumulates any stress from each individual short session.

How to Trim Cat Nails That Are Too Long
Overgrown nails that have started to curve cannot be brought back to the ideal length in one session. The quick grows forward as the nail grows, so if you try to cut severely overgrown nails back to a normal length you will almost certainly hit the quick.
The correct approach is to trim a small amount every week. Each trim encourages the quick to recede slightly and after three to six weeks of this you can reach a normal nail length safely.
If the nails have already curved so severely that they are approaching or have grown into the paw pad, that is a vet visit rather than a home job. A professional can assess whether the pad is already affected and manage it safely.
How to Trim Cat Nails By Yourself With No Help
Trimming cat nails solo is completely doable with the right setup. Sit on a low chair or the floor with your cat in your lap facing away from you. This gives you access to the front paws easily. For the back paws, having your cat sit or lie on a raised surface like a table at your standing height gives you better control.
Work from behind and slightly to the side rather than reaching over your cat which feels threatening to many animals. Keep your body relaxed and your movements slow and deliberate. Fast sudden movements trigger the instinct to pull away.
The lick mat trick is especially useful when you are working alone because it occupies your cat while freeing both your hands to focus on the clipping.
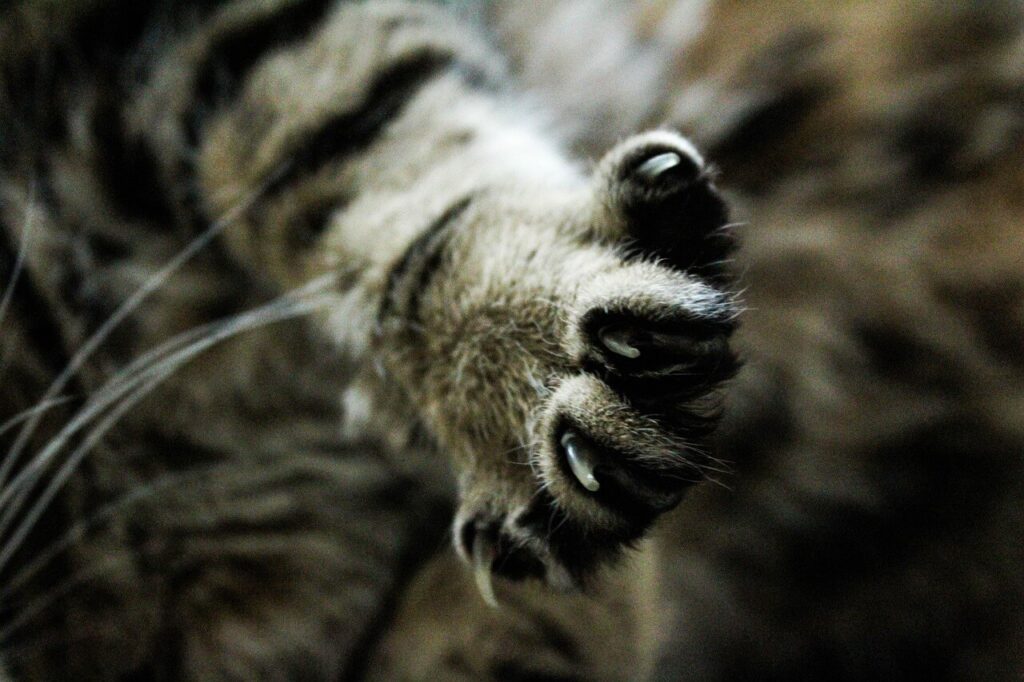
How to Cut Cat Nails at Home When They Are Black
Dark nails intimidate most owners because you cannot see the quick. The solution is the thin slice method. Cut a tiny sliver off the very tip and look at the cut surface of the nail. At first it looks white or pale grey and chalky. As you take successive small slices the center starts to darken and a small dark dot or oval appears. That dark center means you are right at the edge of the quick. Stop there.
Work in good lighting and cut in small increments. It feels slow but it is the only safe approach for black nails and once you have done it a few times it becomes second nature.
How to Stop Cat Nail Bleeding at Home
Cutting the quick will happen eventually even to experienced owners. Stay calm because your cat mirrors your reaction. Panicking makes them panic.
Press a pinch of styptic powder firmly against the nail tip and hold it for thirty seconds. The bleeding stops quickly with styptic powder. If you do not have it, press a small amount of cornstarch against the nail and hold steady pressure for one to two minutes.
Keep your cat still and quiet for a few minutes afterwards. Check the nail before letting them move around freely to confirm the bleeding has actually stopped. The nail will be tender for a day or two but heals quickly and causes no lasting harm.
Building a Nail Trimming Routine That Sticks
The cats that are easiest to groom are almost always the ones whose owners started handling their paws from a young age and made nail trimming a regular unremarkable part of life. If you have a kitten start now even before the nails actually need trimming. Practice holding the paws, extending the nails, touching them with the clippers. By the time real trimming is needed your kitten will have no idea there is anything to be concerned about.
For older cats who are already resistant the process takes longer but it does work. Pepper is proof of that. The key is consistency, patience, and ending every session on a positive note regardless of how many nails you actually managed to get done.
Pair nail trimming with the rest of your cat’s grooming routine. Check the ears, brush the coat, and follow the whole session with something your cat loves. Making grooming a package of calm positive experiences rather than isolated stressful events changes how your cat relates to being handled over time.
For more on keeping your cat healthy and comfortable at home check out our complete guide on why does my cat meow so much which covers another common cat concern in the same practical way, and our article on why is my cat vomiting for understanding the health signs that tell you something needs veterinary attention.
If you have a dog as well and want the same step by step approach for their nails our guide on how to trim dog nails at home for beginners covers every detail including black nails, overgrown nails, and dogs that are scared of clippers.
The Bottom Line
Learning how to trim cat nails at home by yourself is one of those skills that feels impossible until suddenly it is not. The first few sessions are the hardest. After that it becomes routine, for you and for your cat.
Get the right clippers. Have styptic powder ready. Take your time with desensitisation if your cat is resistant. Use the lick mat if you need a distraction. Cut less than you think you need to. Stop if either of you is getting stressed and try again tomorrow.
Pepper now puts her paw out on the arm of the sofa when she sees me pick up the clippers. Not because she loves it. Because she knows it is quick, it does not hurt, and there is a treat at the end. That is the goal and it is completely achievable for every cat and every owner.